How To Add A Contact Form To WordPress (Beginner’s Guide)
Do you want to learn how to add a contact form to WordPress without needing to know HTML and CSS?
Kali Forms is a powerful yet user-friendly form plugin. It allows you to create everything from forms for digital college applications to complex online order forms.
We’re going to take it down a few notches and demonstrate how to use it to add a simple contact form to WordPress.
Installing the Kali Forms WordPress plugin
We’ll be using the premium version of Kali Forms for the purpose of this tutorial, but you can just as easily use the free version available in the official WordPress plugin directory. In fact, you’ll need this version installed in order to use the premium version.
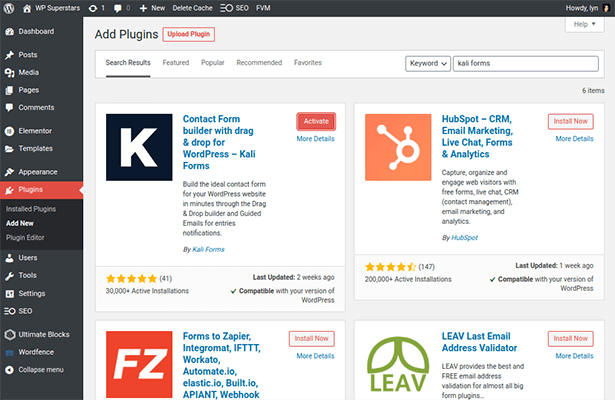
The plugin file for Kali Forms Pro is double zipped, so you’ll need to unzip the original ZIP file you downloaded from the plugin’s website in order to find the proper ZIP file you need to upload the plugin to WordPress.
Head to the plugin’s Licensing page in WordPress after installation and activation to log into your account. This will enable you to confirm your license for updates.
Designate which email address you want form submissions sent to in the SMTP settings.
How to create a simple WordPress form
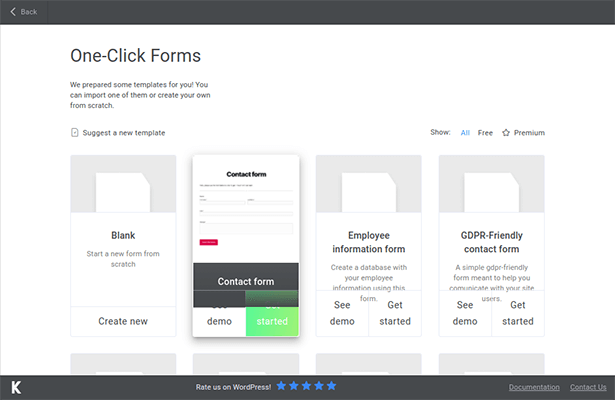
Kali Forms has a contact form template you can use to generate this type of form in seconds. All you need to do is head to Kali Forms → Add New, and select Contact Form to create it.
You’ll be asked to select a style after that. Most use the same color scheme but feature different styles for borders. Zoom in if the preview images are too small to see detail.
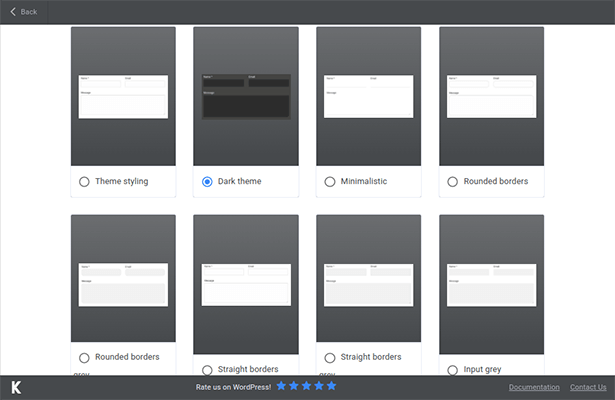
Click the Import button once you’ve made your decision.
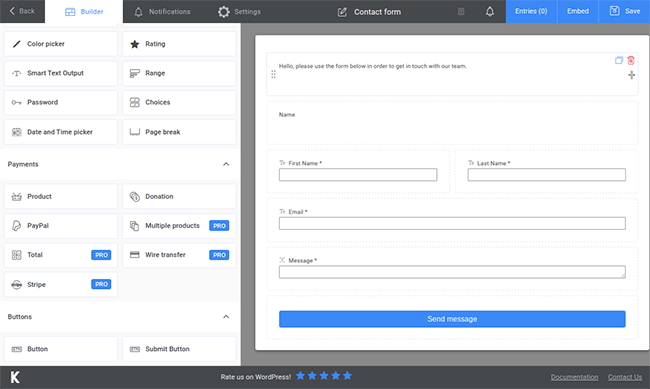
The Kali Forms form builder doesn’t use a live preview of your form, so don’t fret when you don’t see the style you chose when you first enter the builder.
You’ll notice how the plugin has already generated the following key fields important for contact forms:
- Text for a greeting message
- Text for name
- First and last name textboxes
- Email address
- Message
- Submit button
You don’t need the first two fields as you can introduce your form on the page you insert it on. Remove them by clicking the red trash icon associated with each.
As a side note, be sure to save your form throughout this process to ensure any changes you make aren’t lost if you suddenly lose access to this page.
Let’s view one of the field’s properties to get a closer look at how you can customize each. Click the First Name field. You can see how it’s a simple textbox field that’s been given a field name of “first-name” and the label “First Name.”
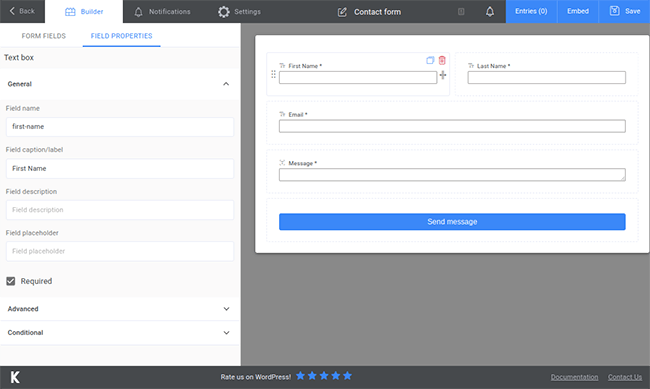
The label is the text that will appear at the top of the field, so it should be as descriptive as possible.
The placeholder field dictates which text appears in the field before the user enters their own. This could be as plain as “John” or “Jane,” your own name, a made up name, or the name of a popular figure (real or fictional). The placeholder field is merely there to help users understand exactly what you want them to enter in the field.
Leave the description field blank as the label “First Name” is descriptive enough for users to know what information they need to enter in this field. Only use the description field when you want specific information and feel your label and placeholder aren’t descriptive enough to clarify exactly what you want users to enter in that particular field.
You’ll also notice this field’s Required option is enabled, and you should keep it that way. This ensures the user can’t submit their form until this field is filled out, which helps to prevent incomplete form submissions from appearing in your inbox.
Go ahead and take a look at the additional fields to see if there’s anything you’d like to add or change.
Adding fields
You can also add fields anywhere you want on your form with Kali Forms’ drag-and-drop feature. For instance, if you need the user’s website, add the URL field. If you need their phone number, add the Phone field. If you need a document from them, add the File Upload field. If you need them to choose between one or more options, add the Radio, Checkbox or Dropdown fields.
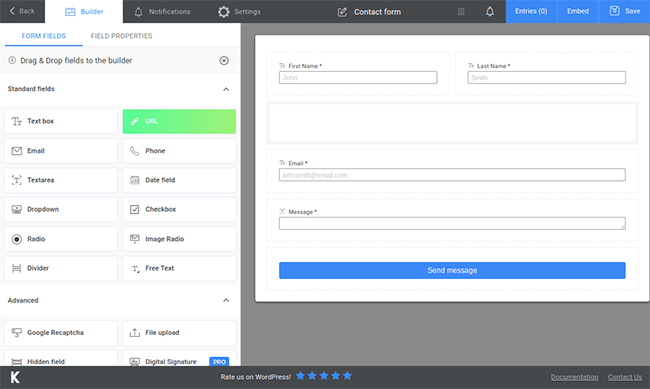
Decide what information you need to collect from users, and add the most appropriate field for each.
If you look below the trash icon when you hover over a field, you’ll notice a resize icon you can drag left and right to make the field shorter or longer. If you make two fields small enough, you can place them side by side like the first and last name fields.
If you want to break up your form into more than a page, add the Page Break field between rows of fields to create sections. The form itself will still display on one web page, but only one section will display at a time.
Lastly, add the Google Recaptcha field at the bottom of the form to prevent spam from bots.
There’s not much to configure after that for a simple contact form as the default options will work just fine. You should, however, open the Settings page, and add your recaptcha site and secret keys.
Lastly, you can rename your form by editing the name in the middle of the top bar.
Inserting your form on WordPress pages
Once you save your form, click the Embed button next to the Save button. This will copy the shortcode to your clipboard. You’ll also find this shortcode on the All Forms page.

It’s just a matter of pasting the shortcode into Gutenberg’s Shortcode block after that.
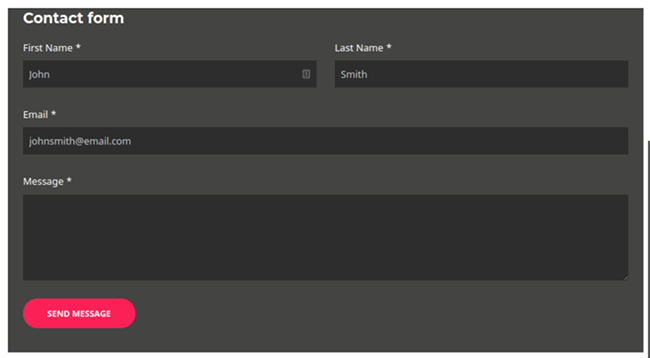
Fill out the form yourself on the frontend to generate a test email.
By default, forms will be sent using the built-in WP mailer. However, you do have the option to customize your SMTP settings by going to Kali Forms → SMTP Settings.
