How To Add A Post In WordPress (Beginner’s Guide)
Are you ready to start a blog on your WordPress website but still aren’t quite sure how to use the WordPress post editor?
In this post, we cover everything you need to know about creating a blog post with the web’s most popular content management system.
How to add a post in WordPress
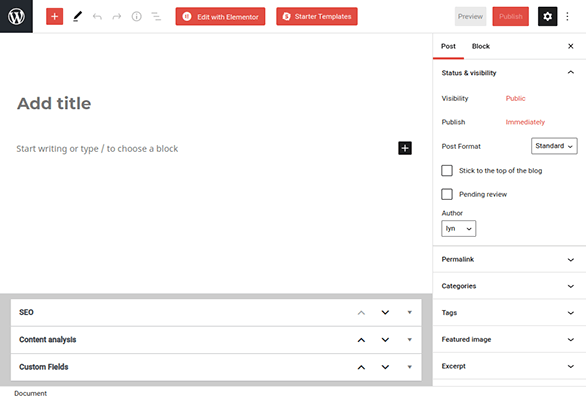
First, log into your WordPress site and on the admin panel to the left hover over Posts, then Add New. This creates a new WordPress post draft.
Now we have your first draft WordPress post, our next step is to add in the content. We will go through the following:
- Blog post title
- Headings
- Post content
- Content images
Blog post title
Add a post title in the Title field (where it says Add title). If you need help on writing your blog post title check out Blogging Wizard’s guide to writing better headlines.
Click Save Draft to solidify your new draft. WordPress has an autosave feature, but it’s good idea to get into the habit of clicking the Save Draft button every now and again to ensure you don’t lose your work if you lose your internet connection or power.
Use headings to structure your WordPress posts
Once you’ve entered a post title, we can move onto post structure using headings.
Blog posts use H1-H6 tags, which are different heading tags that control the size and importance of headings. Your theme uses the H1 tag for your post’s title, so you should not use it in your post’s content.
Instead, use H2 tags for sections, H3 tags to divide sections into subsections and H4 tags if you need to break your subsections down even further.
Think of the textbooks you had in school or even the last time you read the news or a magazine. They all use this hierarchy to separate the different sections and ideas that make up a chapter or article.
Blogging is no different, except for the fact that you should use shorter paragraphs to make your content scannable and more web friendly.
To add your first H2 tag, click the black plus + button. If you don’t see it, place your cursor at the end of your last sentence, and press Enter to create a new paragraph.
What this button does is allow you to insert the various blocks that make up the block editor (Gutenberg) within WordPress. Choose the Heading block to insert a heading. Search for it if you don’t see it.
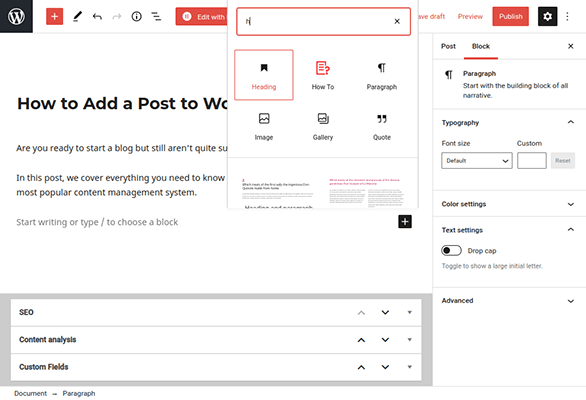
Make sure H2 is selected, then write the title of your section.
Do this with the rest of your article, inserting the appropriate heading tags when needed and applying text styles. Consider using bold text on key phrases and important information throughout your post to make it that much more scannable.
Adding post content
Click where it says “Start writing” to add your post introduction by writing or pasting it in. As soon as you do, WordPress’ floating text editor will appear. Highlight different parts of the text to use text settings, such as bold text, italicised text, links and more.
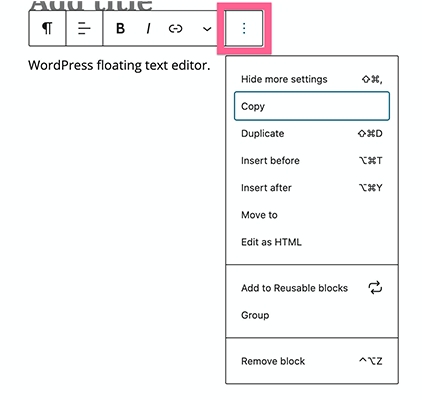
By clicking on the three dots a dropdown menu will appear with further features such as copy and duplicate, which will copy and duplicate the block you’ve just created. If you’re familiar with html code, you can edit the block in html.
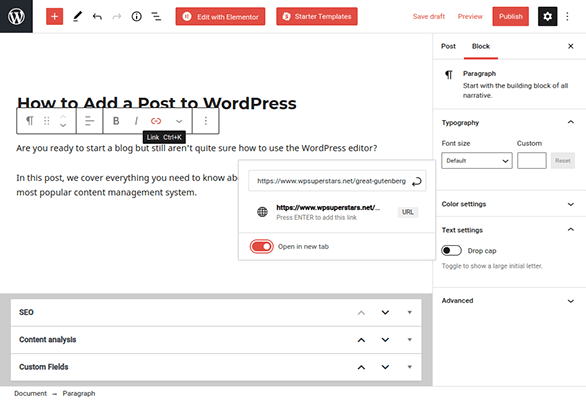
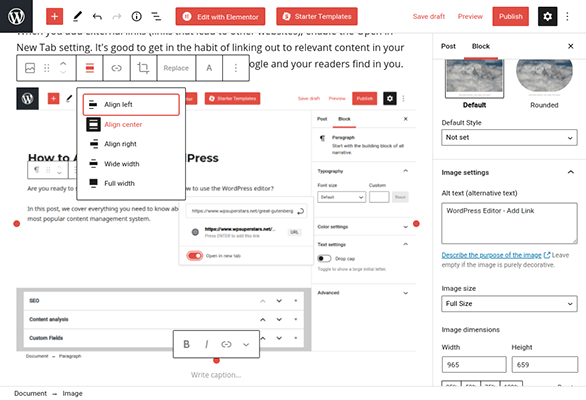
When you add external links (links that lead to other websites), enable the Open in New Tab setting. Linking out to relevant content in your posts to increases the amount of value and trust Google and your readers find in you.
Quick tip: The WordPress block editor supports pasted content from a variety of different sources, including Google Docs, Microsoft Word and Apple Pages. If you don’t want to write your first draft in WordPress, write it in one of these word processors, then copy and paste the content into the WordPress editor when it’s ready to go. Google Docs exports everything, including text styles, headings and images.
The Block tab in the right sidebar is where you control the settings for each individual block. Keep in mind that every paragraph is its own block, so if you want to customize font sizes for an entire section, you’ll need to edit each individual block or use the Group block to combine them.
Your theme should have a section in the customizer for controlling font sizes sitewide, so don’t feel the need to customize fonts for individual blog posts. You can find these settings by going to Appearance → Customize → Typography (your theme may have these settings in a different location).
How to add images to the block editor
Use the same process to add images to your post, but choose the Image block instead. Click Upload, and choose an image file from your system to upload and insert into your post.
Align the image to the center, and add a short, descriptive phrase for it in the Alt Text box. You should also make sure “Full Size” is selected as an image size.
Be sure to check out this guide on making images look good and our guide on optimizing them for the web if you need help on creating images.
Preparing your post for publication
Once you’re done adding your post to WordPress, you’ve only got a few post settings to attend to. These are:
- Post URL
- Categories and tags
- Featured image
- Meta description
First, save draft then click the Preview button at the top of the page, and open a preview of your post in a new tab.
This allows you to check on paragraph sizes, test links, and ensure your images are aligned and appear sharp.
Now is the time to finalize your headline. Make it catchy yet descriptive, and use your keyword in it.
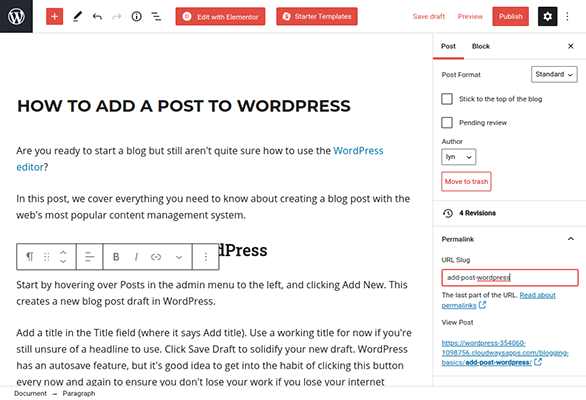
Create a post URL
You should also create a permalink for your post. Open the Permalink tab of the settings panel to the right, and add a short URL similar to your headline. Just be sure to use your keyword and cut out stop words like “a” and “the.” For example, “add-post-wordpress” would be a suitable slug for this very post.
Add to categories and tags
Next, open the Categories tab, and assign a parent category to your post. You can assign a child category as well if relevant. Add a new category on the spot if needed.
If there are topics you mentioned that you’re likely to mention again in other posts but aren’t important enough to create entire categories for, add them as tags.
You can also manage your categories from outside of the WordPress block editor, by visiting the categories screen.
Featured image
Next, add a featured image to your post. This image will represent your post on your homepage, Blog page and category archive pages. Social media platforms may even import it automatically when you create a new post.
As for size, consult your theme’s documentation to get the correct dimensions for your featured image.
Adding a meta description
Install an SEO plugin on your site, such as our preferred plugin SEOPress.
This plugin will insert a box at the end of your post that will allow you to create your own meta description. This is what displays as a preview in search results.
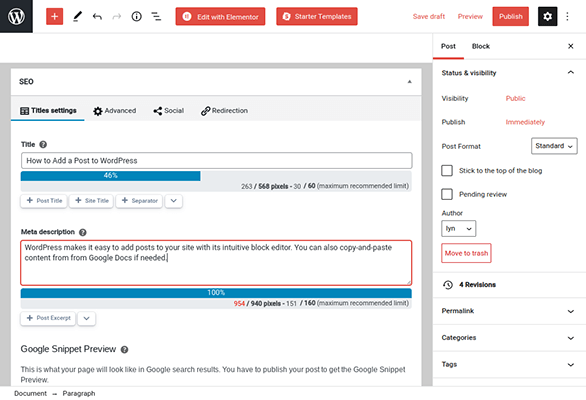
We’re using SEOPress in our screenshots. It has character limit guides that let you see if your title and description are too long. They’re based on Google’s character limit for descriptions in search results.
Insert your keyword as close to the beginning of your meta description’s title as possible. You don’t need to use the same title you put in the WordPress editor.
Use your keyword in the description as well. Write a description that thoroughly represents what your article is about while catching your reader’s eyes in search results. Try to briefly answer the question your article covers. Your readers are looking for solutions. Give it to them in a few short sentences to entice them to come to your post to learn more.
SEOPress also has a content analyzer that lets you know how optimized your post is for your chosen keyword.
Publishing your post
Your first WordPress post is now ready to be published so hit the Publish button and the post will now appear on the frontend of your blog where your readers can see it.
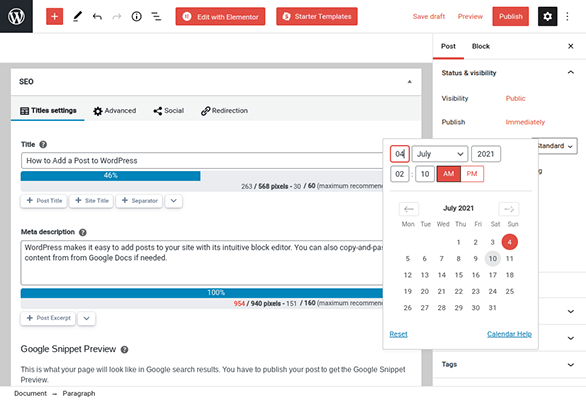
Use WordPress’ built-in scheduling tool if you want to publish it at a specific date and time. The CMS will publish it for you automatically.
Once you are done, it is time to promote your blog post. When you’re ready, be sure to check out our guide on what to do once you’ve published your first blog post.
Over to you
Putting a post in WordPress can be daunting knowing the end goal will be readers checking out your content, however, the process is relatively simple.
To summarize:
- Log into your WordPress site, hover over Posts and click Add New.
- In the post editor enter your title, then if you are writing from scratch start entering in your content by clicking the plus button to add blocks. By clicking the plus button you’ll see a range a blocks you can add such as headings, images, lists etc. If you have already written your content, paste into a block and Gutenberg will automatically separate it into blocks.
- Save draft throughout.
- Preview your post to check for formatting errors.
- Create a post URL, add to relevant categories and tags, add your featured image and write a brief meta description using an SEO plugin.
- Publish or schedule your new post, then promote your new post.
